You built your mobile application against a localhost server and now you have to ship it to client for testing against several environments (development, testing, acceptance and/or production)? Are you wondering how to do that? If so, you’re at the right place.
If you have to build your mobile application against (only) 2 environments, you can use this plugin. But in my case, I had to build my application for several environments.
So, this is what I did:
NativeScript CLI allows you to customize the build process using hooks (you can read more about hooks here. What you need to do is to write your custom hook, which will be executed during the build and which will copy your configuration to the app folder based on the build profile.
Let’s create your config first. In your project directory, create a config folder. In this folder, create json files with configuration with your build profile in name: config.<<build_profile>>.json.
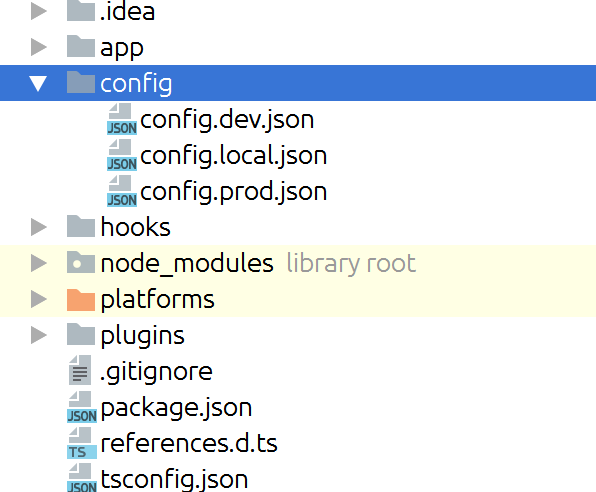
Now, write some config in json file. For example, you can have a server url there:
{
  "serverUrl": "http://localhost:8081/",
  "buildProfile": "local"
}
Next, in the hooks directory of your project, create a file with name: after-prepare.js.
var path = require("path");
var fs = require('fs');
var mkdirp = require('mkdirp');

module.exports = function (logger, projectData, usbLiveSyncService) {

    var readStream = null;
    var writeStream = null;
    var hasError = false;

    function rejectCleanup(err, reject) {
        hasError = true;

        readStream.destroy();
        writeStream.end();
        logger.error(err);
        reject(err);
    }

    function createReadStream(buildProfile) {
        var fileToRead = path.join(projectData.projectDir, 'config', 'config.' + buildProfile + '.json');

        readStream = fs.createReadStream(fileToRead);
        readStream.on('error', rejectCleanup);
    }

    function createWriteStream(directoryToWriteTo, resolve) {
        var fileToWriteTo = path.join(directoryToWriteTo, 'config.json');

        writeStream = fs.createWriteStream(fileToWriteTo);
        writeStream.on('error', rejectCleanup);
        writeStream.on('finish', function () {
            if (!hasError) {
                resolve();
            }
        });
    }

    return new Promise(function (resolve, reject) {
        // do not copy on live sync
        if (!!usbLiveSyncService.isInitialized) {
            resolve();
            return;
        }

        var buildProfile = process.env['BUILD_PROFILE'];
        var directoryToWriteTo = path.join(projectData.projectDir, 'app', 'config');

        mkdirp(directoryToWriteTo, function (err) {
            if (!err) {
                createReadStream(buildProfile);
                createWriteStream(directoryToWriteTo, resolve);
                readStream.pipe(writeStream);
            } else {
                rejectCleanup(err, reject);
            }
        });
    });
};
This code will parse a build profile from the node environment variable and will copy the config file from YOUR_PROJECT/config to YOUR_PROJECT/app/config.
Next step you have to do is update package.json to register the hook and write a script which will set the build profile environment variable and trigger the build:
"nativescript": {
  "id": "nl.davinci.nativescriptapp",
  "tns-android": {
    "version": "3.1.1"
  },
  "hooks": [
    {
      "type": "after-prepare",
      "script": "after-prepare.js"
    }
  ]
},
"scripts": {
  "run-android": "cross-env BUILD_PROFILE=local tns run android",
  "run-dev-android": "cross-env BUILD_PROFILE=dev tns run android",
  "debug-android": "cross-env BUILD_PROFILE=local tns debug android",
  "build-android": "cross-env BUILD_PROFILE=local tns build android",
  "build-dev-android": "cross-env BUILD_PROFILE=dev tns build android"
},
We use the cross-env plugin to set the environment variable and the mkdirp plugin to create a directory.
So, Install these plugins:
Now, try to build your project with one of the scripts provided and you should have the config folder with json config available in your app directory. To use the config, just import it to your code:
let config = require('./config/config.json');

console.log(config.serverUrl);
This is it. Now, you have different configurations for every environment. If you tweak the after-prepare hook a little bit, you can copy typescript files, in which you can export functions with different logic. For example, when you build your app for different customers, who have different logic for the price calculation.
I recommend you to add app/config/config.json in your .gitignore as this is a generated file.
CLI skips the prepare phase if the application was previously built. If you want the build prepare phase to be always executed, and thus to always trigger the after-prepare hook, then add ”–clean” option to build script:
"build-android": "cross-env BUILD_PROFILE=local tns build android --clean",
THE END
Java Developer
Martin v Davinci software pracuje ako Java Developer, ale venuje sa aj databázam. Vo voľnom čase pracuje na appkách pre Android, ktoré ho, podľa jeho slov, urobia boháčom. Medzi kolegami si buduje povesť veľkého fanúšika Mira Jaroša. Jeho obľúbeným hudobným štýlom je však electro. Zo športov mu najviac imponuje reálny futbal (žiadna FIFA). Neznáša kolobežkovanie.
Do you see yourself working with us? Check out our vacancies. Is your ideal vacancy not in the list? Please send an open application. We are interested in new talents, both young and experienced.
Join us